Description
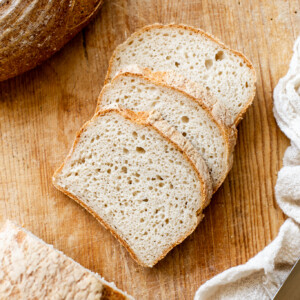
This Gluten-Free Bread recipe with yogurt (I use dairy-free to make this a vegan bread) was repeatedly called “the best gluten-free bread ever”! The yogurt adds softness and tang to the fluffy gluten-free bread, giving it a sourdough-like flavor without the need for a starter. You only need seven ingredients and three hours of mostly hands-off time to make this delicious yeast bread.
Ingredients
- 18g psyllium husk
- 20g maple syrup or cane sugar
- 320g hot water
- 200g unsweetened yogurt, I used dairy-free cashew yogurt, don’t use a super thick yogurt here – a thinner one works great
- 5g (1 teaspoon) apple cider vinegar
- 460g gluten-free bread flour blend
- 12g sea salt
- 7g instant yeast, make sure it’s gluten-free, see Notes for how to use active dry yeast instead
Instructions
- In a bowl or large liquid measuring cup, mix together the psyllium husk, sweetener, water, yogurt, and apple cider vinegar. Whisk together, breaking up the psyllium, and let it set for a few minutes until it’s thickened and gel-like.
-
In a large mixing bowl or the bowl of your stand mixer, mix together all of your flour blend, salt, and yeast. Whisk to combine.
-
Add the psyllium gel to your dry ingredients. If using a stand mixer, fit it with the dough hook and let it mix up the dough until combined and smooth, scraping down the sides a few times during the process, and flipping the dough around to make sure it’s fully mixed on the bottom too. You can also do this by hand. If doing it by hand, I like using a dough whisk to get it mostly combined. Then, turn it out onto the countertop and use your hands to knead the rest of the flour in. The dough should feel pretty soft and light – this is not a super dense dough. If your dough seems dense or dry, it could be from a difference in yogurt texture. Add up to 30g extra water to get to the right consistency if it seems necessary to make your dough workable!
-
Cover with a tea towel and let the loaf rise for one hour in a warm place. It should just about double in size, and it will feel light and puffy to the touch when it’s ready. Preheat the oven to 425℉ while it rises with a Dutch oven inside if using.
-
Once it’s risen, score the bread (carefully flipping it out of the banneton onto parchment or a silicone sling if baking in a Dutch oven). If you’re baking in a loaf pan, you may want to brush the top with oil to get a nice golden crust and help soften it slightly.
-
Place into your baking vessel if using a Dutch oven. If using a loaf pan, just place it right into the oven. Bake for 1 hour and 20 minutes, removing the lid for the last 15 minutes if baking in a Dutch oven. It should be golden brown and crusty.
-
Remove from the baking pan. Turn the oven off, place the loaf directly on the oven rack, and prop the oven door open. Let the bread start to cool inside of the oven for 30 minutes to 1 hour. This helps to finish cooking off any gumminess inside of the loaf.
-
Remove from the oven and set on a cooling rack to cool completely. This is definitely the hardest part, but you really need to let the loaf cool completely so the inside can set. I try to let it cool overnight, but you’ll want to let it cool for at least four to five hours. It should be fully cool to the touch before cutting into your loaf.
-
Slice and eat. This bread is great raw, toasted, or however else you want to enjoy it!
- To store, I like to slice the whole loaf and keep it in the freezer. It will store well for up to 6 months. You can also keep it in a bag or container at room temperature for up to 2 days, or in the refrigerator in an airtight bag for up to 1 week.


Notes
If your bread has gumminess, this is generally from the liquid/flour ratio being off. It can be exasperated by coarsely-milled flours, not letting the psyllium gel for long enough, and incorrect baking times. To help mitigate this, you can let the bread cool for a while in the oven with the door propped open – this helps it finish baking slowly and dries the center out. Also, make sure to cool the bread completely before you cut into it.
To use active dry yeast: start by activating the yeast. In a small bowl, combine the yeast with the sweetener of your choice and 100g of warm water (from the 320g of water), between 100-110℉. It should feel warm, but not hot, to the touch. Let it sit to activate for about 10 to 15 minutes. You should notice it start to to bubble, and then it will get nice and foamy on top. Once activated, continue on with the recipe by combining the yeast with the psyllium husk/water/yogurt mixture.
How to store gluten-free bread
- At room temperature: You can also keep it in a bag or container at room temperature for up to 3 days. The bread will start drying out by day 3 or 4, so I recommend freezing it by then.
- In the refrigerator: place into an airtight bag for up to 1 week.
- In the freezer: I like to slice the whole loaf and keep it in the freezer. It will store well for up to 6 months. Place sheets of parchment between each slice to prevent them from sticking together.
- To reheat from frozen: microwave the bread slices for 30-60 seconds or place them in the oven at 350F for 5 minutes, or until you’ve reached your desired level of toastiness.